Showing posts with label photo-editing. Show all posts

Tuesday, January 11, 2011

because i felt artistic...

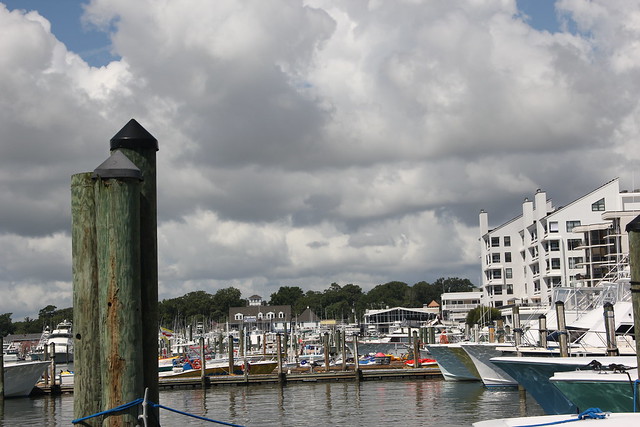
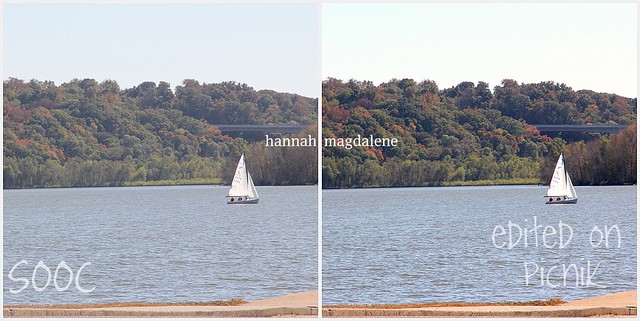
Those of you who read my main blog know that I had the sudden inspiration to edit photos from and post about some things from our Virginia Beach vacation last summer.  While editing, I came across this certain lovely landscape.  (Below SOOC)
sooc
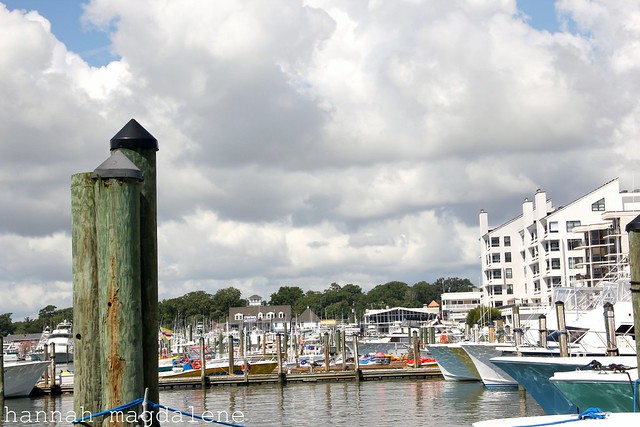
I liked it, although, obviously, it looked rather bland.  I uploaded it to Picnik and did this rather basic edit.
IMG_1514basicish
Nice, but it needed something...more.  It was then that, feeling a bit artistic and odd, I created a this set of edits, working off my original basic edit for the photo.  I had lots o fun messing around....
IMG_1514e

Here's my first one, using Cross-Process to a certain extent (I forget what).  Mmm, I love this Picnik effect.
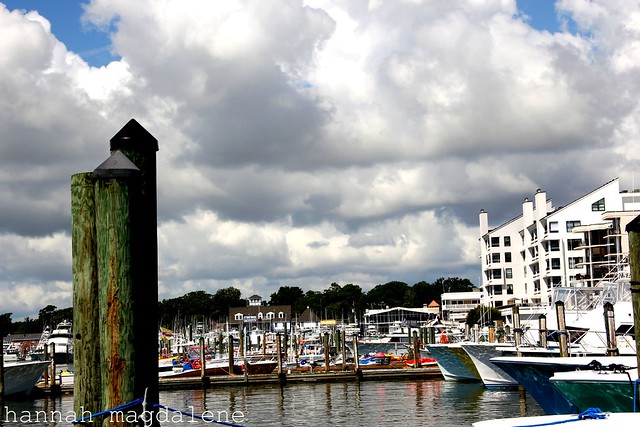
IMG_1514contrast

For this, I brough the exposure down and contrast up.  Funky, I know.
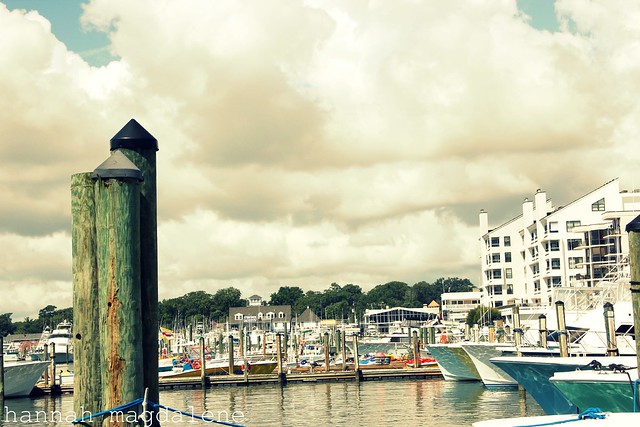
IMG_1514color
This one consisted of bring the saturation down and the temperature about as high up as it could go.  It ended looking sort of old-photograph-ish.

IMG_1514bw

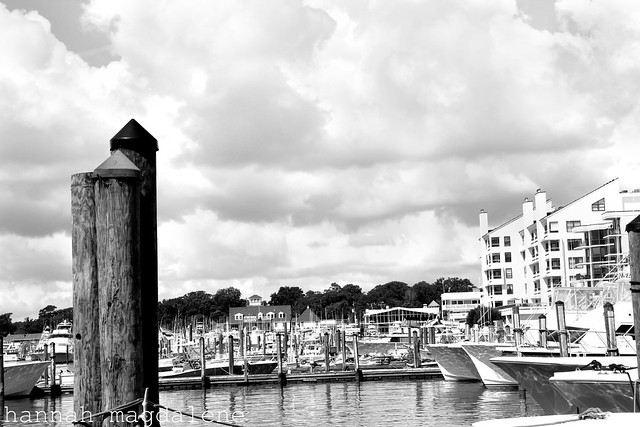
I decided that I needed to revert back to something I knew well at this point.  Which brought me to a traditional black and white image.  I used my Picnik recipe consisting of using "Boost" after the inicial revert.  Because Boost with the strength to 30% (what I wanted) was blowing out some of the clouds up top, I used the eraser brush
sepia

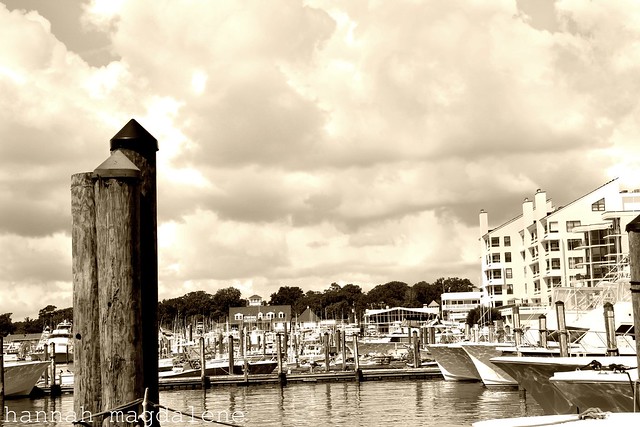
I started this edit with the previous black and white and faded the Sepia about 30%.

So now I'm a bit curious...which is your favorite?

And am I the only one who goes on strange editing stints like this sometimes? ;)

love!
hannah m.

Thursday, December 16, 2010

Before&After | merry christmas

I took this photo at a loverly old house we were touring while in NC (which I'll be posting on my main blog later today).  Besides the fact that I unintentionally cut off the C in Christmas, I really and truly like it.
merrychristmas(before)

To give it a bit of umph, though, I wanted to warm it up a bit and bring out the red lettering.  After a bit of experimentation on Picnik, I came up with this...

merrychristmas(after)

And, I am in love. :)

More Before's and After's at Pixel Perfect today!


-Hannah

Thursday, November 18, 2010

Your Questions, My Answers | photo-editing edition

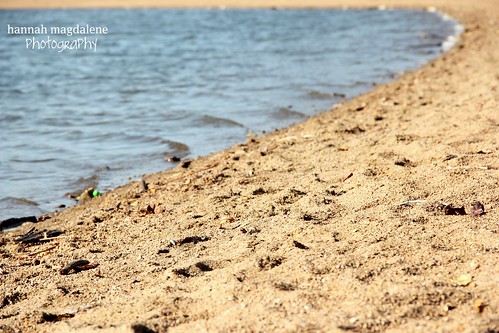
at the beach...

Welcome to part two of the epic me-answering-your-questions-in-a-fashionably-late-manner. Actually, forget the fashionable part. I think I've passed that stage.

Moving right along, though - If you missed part one, head on over here. If you don't fall asleep before you finish it, you can come back on over here and digest part two - all about photo-editing. This is actually the shortest section, so you might be actually be able to do it. ;)

~~~~~~~~

Black and white or sepia?

Oh, fun question!  I go in phases...and right now I'm in black and white mode.  But really, it depends on the photo.  Sometimes it's just begging for some sepia, you know? 

Or maybe that's just me.

How long would you spend on editing a shot, if any time?

Once again - depends on the photo. Unless I'm doing a bunch of different edits or am working on a particularly difficult case, then I'd like to say about three minutes (this includes Picnik's uber-duber-slow uploading system, which does not agree with the high quality images my camera produces, at all.)  I should time myself sometime!

Do you have any "basic" or "standard" steps that you take when you edit photos --i.e., you do this for pretty much each and every photo that you edit?

Well, I edit my photos in you-know-what. So, unfortunately, editing photos for me does not mean messing with layers and actions. Basically, the routine goes like this:

-fall asleep while Picnik uploads my photo (okay, fine, I'm exaggerating)
-do basic editing: exposure/contrast, color, cropping or rotating if necessary, etc.
-then, analyze things: is it good to go or does it need something more?
-if I go with "something more", I'll then move into create and experiment. my go-to items are Black and White, Sepia, Cross Process, Texture, and Curves Adjustments. (that sounded like a really strange bunch, but it's true.) If it's a portrait, I generally do eye-brighten and some other things too. it just all depends, you know, on the photo.
-and, most of the time, I'll add my watermark sometime before I leave

Ta-da. Gotta love Picnik. (Or not.)

Are you a BIG editor (meaning you edit a lot of your photos)?

I edit just about all of the photos I post on my blog and then some. I don't edit as many photos as I'd like to, mainly because of, you know, Picnik's uploading system. And because of my lack of time to spend in front of the computer editing pictures that I don't have anything to do with at the moment. So, I'm not exactly sure if I'm a "big editor" or not - kind of sort of maybe is the only answer that my mind is currently generating.

Sorry! It malfunctions a lot.

Do you plan on making more "Picnik Recipes" in the future?

Oh, I'm so glad you found those helpful. Yes, I think I will be sharing some more recipes soon. Hopefully I'll get a post together within the next few weeks or so.

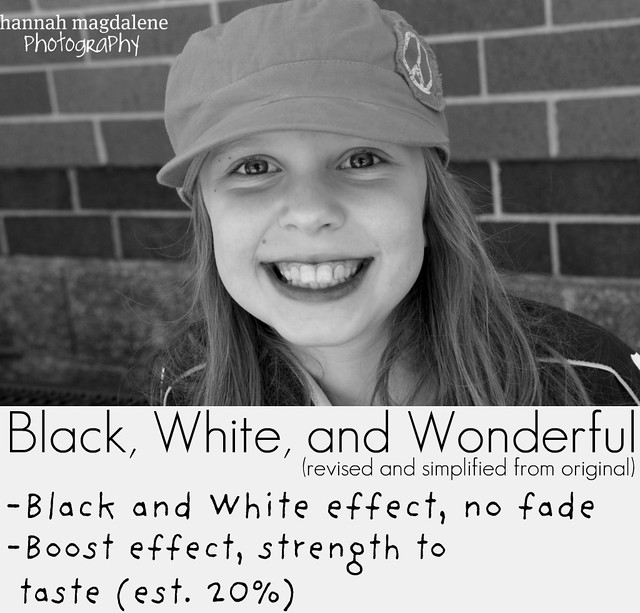
Or, actually, while I'm at it, here's a renovation of my original "Black,White, and Wonderful" recipe (I've simiplified the original a bit and have been using it all the time):

BBW.picnikrecipe
(Here are the other recipes I made a while back.)
____________________________________

Once again, if you have a photo-editing-related question that I didn't answer, you can test my knowledge below and I'll get back to you (also in the section below).

Part three - about me and my photography, as well as some misc. questions - will be up shortly, along with photo challenge finalists!  You still have some time to enter if you haven't already (click here).

Love,
Hannah

Thursday, November 11, 2010

Before&After | Soccer

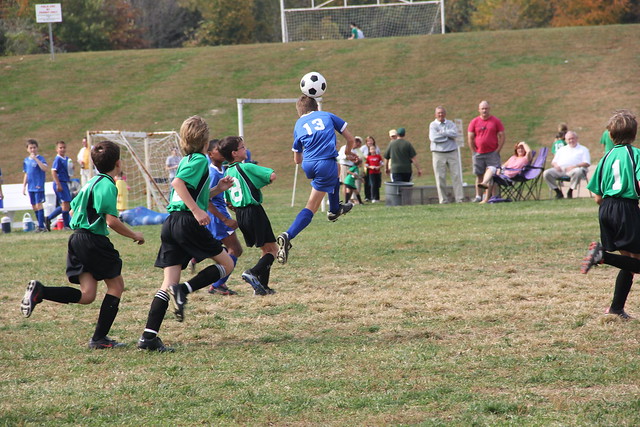
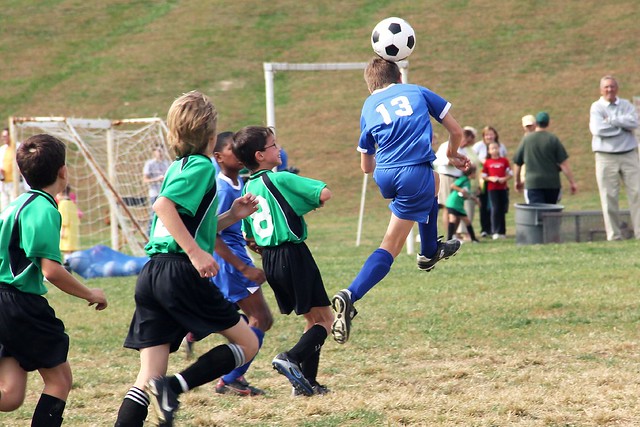
I'm using this as a little sneak-peek opportunity for a shoot I did during my brother's soccer game a few weeks ago. Something I learned here was how annoyingly hard it is to get an image like this completely in focus, and I nailed it here.  Oh, and #13 (whoever he is) is a pretty awesome. Just sayin'.

SOOC:
soccer SOOC

Canon Rebel T2i |  1/250 | f/8.0 | 135 mm | ISO 200


And my edit, on Picnik.com using premium elements...

soccer edit
I forget exactly what I did here, but I know everything was pretty basic - cropped, brought up exposure/contrast, perhaps done some things with curves...but that's pretty much it.

More Before&Afters today at Pixel Perfect - Just click.


Happy Thursday!

Friday, November 5, 2010

fix-it friday #77

Man, it's been awhile since I've participated in a Fix-It Friday over at I Heart Faces.  I was very much afraid that I was going to have to bypass it again this week, but when I saw this sweet gal being featured...well, I couldn't help myself. ;)  Today we're using these beautiful photo of Michelle Johnson's:

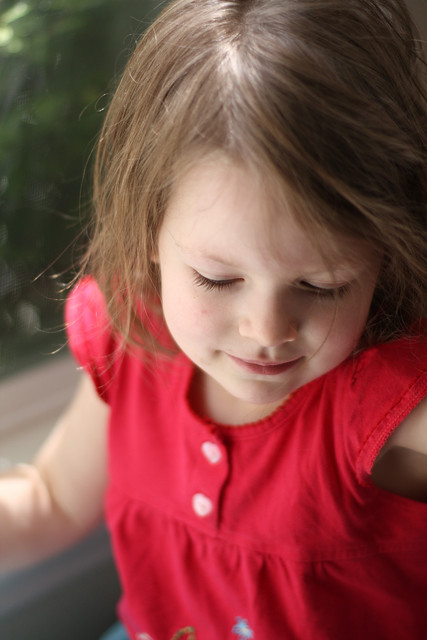
Here's SOOC:
fixit_77 sooc
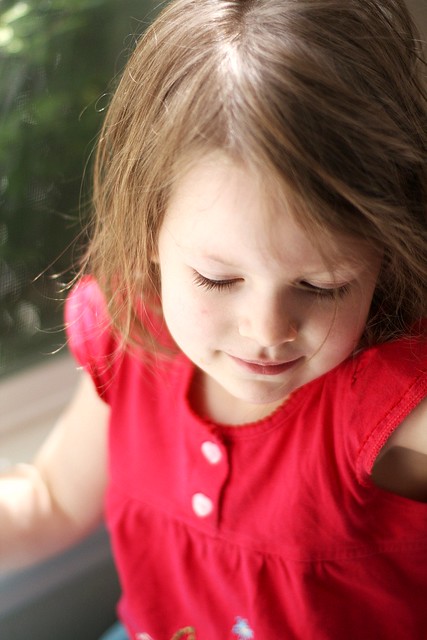
I really didn't have to do much here - Just a few minor changes in layers, exposure, and temperature in Picnik.
fixit_77 color
I then decided to add some texture just for fun - and I really like what it did.
fixit_77 textured

I was also curious to see what this would look like in black and white, and did an addition B&W with sepia edit as well (click to enlarge).  Loveliness:-)
fixit 77 sepia
fixit_77 b&w


What do you think?  And, as usual, which is your favorite?
More beautiful edits of this photo at I Heart Faces!

Have a great weekend, everyone!
-Hannah

Thursday, October 21, 2010

tilt-shift love

As you may or may not know, I'm participating in the October 2010 Photo Hunt.  It's been a very neat experience so far, although I'm quite behind in getting all of my photos taken for the month - Eek, it's not the 21st by chance, is it?  Goodness.  I need to get moving.

But anyways, I was rather scared of a certain assignment by the name of "Tilt-Shift photography".  After doing a bit of research and finding out what the heck it was (*blushes with embarrassment*) I got freaked out.  How on earth was I going to achieve this - without photoshop?

In all my excitement, I forgot about a link I had been given to an actual Tilt-Shift maker.  After finally heading on over, I was a little relieved.  It seemed that they did the whole thing for you.  I had hope.

So, after taking this shot while on a bike-ride the other day, I decided to give it a try.  I did a quick, basic edit...
Before&After

xposure 0.003 sec (1/320)
{E
Aperture f/14.0
Focal Length 135 mm
ISO Speed 400}

And then headed over to TiltShiftMaker.com.  And uploaded my picture.  And had the jitters.

But for absolutely no reason at all; a moment later I was looking at this...

a first attempt
It worked like magic, and only required a few little adjustments on my part.  Then I just downloaded it onto my computer to gaze at.  Yes, Hannah, you actually took this picture.


 I'm kind of excited. And I have another item to check off the list, which is undeniably satisfying, too;)

Have you ever tried Tilt-Shift Photography before?  Do share!  And if you're new, TiltShiftMaker.com does a wonderful job of explaining and creating everything for you.

And have a lovely Thursday, sweet friends!
Love,
Hannah

Saturday, October 16, 2010

textures in picnik - a tutorial

from the ground

After posting some of my texture photos and telling you I got them through Picnik, I got a few questions as to how it was done, where the textures were, etc.  I thought I'd do a quick tutorial/explanation for those of you interested...and/or confused.


Before I begin...

Friday, September 10, 2010

i heart faces :: fix it friday #70

It's been a few weeks since I participated in Fix-it Friday, but I had a bit of time over lunch today and jumped on the chance to join the fun and edit this adorable gal...
{above - sooc}

My edit, done on Picnik.com, using premium elements. In a nutshell, here's what {I think} I did...

~adjusted exposure, contrast, and colors a bit
~cropped and sharpened
~applied airbrush to background
~applied "shine-be-gone" to cheeks and forehead to reduce glare.
~added text

I didn't have the time to do multiple fixes for this shot, although I wish I could have.  What do you think?
More lovely edits at I Heart Faces.

Friday, August 20, 2010

i heart faces :: fix-it friday #67

It's Friday again, and I couldn't help but fix up this adorable gal I Heart Faces is featuring today!

SOOC:

All edits done on Picnik.com with Picnik Premium.
I bumped up the exposure and contrast, and raised the temperature a *lot*.  I then cropped, sharpened, brightened her eyes, and messed around with curves a bit.  The final product...
I'm really loving how this turned out!
And, of course, my customary black and white edit...
More lovely fixes at I Heart Faces...

What do you think?

Friday, August 6, 2010

I Heart Faces :: Fix-it Friday #65

I know that I should technically be editing and posting pictures from our lovely Virginia Beach and Williamsburg vacation, but I couldn't help but edit this sweet little boy featured on Fix-it Friday this week.  So, sorry Charlie, those Virginia pics are gonna have to wait;-)

Original picture:
Look at those eyes!

I really didn't have to do much in my edit - basically raised the exposure, saturation, and temperature slightly, and brightened the eyes.And my additional edits...
Ahhh, the chocolate egg recipe, my personal favorite:)

What do you think?

And, if you, like me, were unable to resist those sweet blue eyes, head over to I Heart Faces to submit your own edit and see others' as well.
And now - off to get to those Virginia photos!

Love and Blessings,
~Hannah~

Friday, July 16, 2010

I Heart Faces :: Fix-it Friday #62

I'm joining Fix-it Friday at I Heart Faces today.  I absolutely love the sweet picture we were given to edit...

Original SOOC:
My Basic Edit:
I cropped, re-sized, sharpened, and brought up the exposure, contrast and temperature a bunch.

I then decided to try out some of the Picnik Recipes that I shared in my last post (thank you for the feedback on them, by the way!  I'm so glad that they were helpful!)....
{Actually, I tweaked this recipe a little here and brought the exposure up as well as the contrast, just so you know.}

I love how these turned out - Which of these is your favorite?  I can't even begin to decide on mine!

Head over to I Heart Faces for more fix-it fun!;-)
Love and Blessings,
~Hannah

Wednesday, July 14, 2010

Picnik Recipes :: Fun, Tasty Ways to Jazz up Your Photos!

You know how you can buy/download photoshop actions?  Actions are a combination of steps used to produce a certain effect for your photo, and (from what I understand, at least, haha...) they're easy to upload and apply through photoshop.

Sadly, dear Picnik doesn't have such an option.  It has it's own "effects" but I find them pretty limited...and some are just plain weird.  However, I've recently been experimenting with combining different effects to produce a unique, fun, and beautiful look for my photo...similar to what actions on photoshop might do.

I thought I'd share a few of my favorite "Recipes" with you.  Hopefully you'll be able to pick up a thing or two here....

{Note:  I'm trusting that, while you're doing this, you're pretty familiar with Picnik and know where almost everything is.  If you're having trouble finding something on the site, please let me know and I'll be sure to help you.  Remember that some of the things are under "edit" and others are under "create".}
 
The * mark specifies that premium effects are included in the recipes.


Let me know what you think, and if you tried any of these!  Once again, if you have a question, well, you know where to find me:-)

Love and Blessings,
~Hannah

Saturday, June 26, 2010

Watermarking :: What I use

Sveta asked me a week or two ago what I use to watermark my photos.  I thought I'd give a quick overview/tutorial on how I do it, and am finally getting around to it now.  Thanks so much for your patience:-)


So, why do I watermark my photos?  Mainly because I do not want someone to take one of the photos on my site and use it as their own.  Although the chances of this might be slim, why risk it?   I've noticed that my watermark tends to give a "professional" look to my photo.  In a nutshell, watermarking my pictures gives me a sense of security...not to mention how nice it happens to look. :-)


As you might know, all of the photos I edit are done on Picnik.com {there's the answer to your question, Guin!} where I have a premium account.  Picnik has a wide variety of fonts {most of which aren't even premium, so don't worry} and many options when using them.  As I don't have a photography business or anything yet {obviously...} Picnik is perfectly sufficient for my watermarking needs:-)

 Here is a quick over view on how to watermark your photos on Picnik....

{1}  Upload your photo to Picnik.com.  I think that you have to make an account first if you do not already have one -  but it's free.  Proceed to do any editing to it that you'd like.

{2}  Under the "Create" tab, go to the smaller tab, "Text".  Type whatever text you want into the "Type Here" box.  You can then select the font that you'd like to use.  Basically I write

Hannah Magdalene | Photography

in the box and select the font FF Meta Serif SC.  Please note that this is a premium font, which requires that you pay for a premium account to use it.  However, like I said, Picnik has a wide variety of other fonts that are NOT premium as well.  I really like FF Meta Serif SC because of it's simple, clean, and professional look.

Hit "Add" and your watermark should appear in the center of your photo in white. 

{3} Now you can further personalize your watermark however you'd like.  When you click on the text a little box should pop up in the vicinity showing you a variety of options.  You can move the text to a corner or other spot where it's not in the way of your photo's subject, make it smaller or bigger, change the color if necessary, tilt, fade, bold, or italicise it...It's up to you. 

I generally move the text to a spot near but not covering my subject and then proceed to fade it, edit the size, change it from white to black if necessary, and sometimes tilt it for a creative effect.  Just a peek at some ways I've found to put my watermark in photos.....


{4} Do any other editing that you'd like {It won't effect your mark} and save the photo to your computer.  You're done!

Adding an Image to your Watermark:

Adding a little image/flourish to your text can really make your mark more personalized and professional looking.  Under the tab "Stickers" {It's next to "text"} You'll find a host of little, well, "stickers" that you can add to your photo and incorporate into your watermark.  I was experimenting the other day with ways to to this, as you can see below.  All of the images I got were free from the "Floral" section.  All the text except for the very bottom one was free as well.
{In case you're wondering, this picture is from my trip to Italy - a small Italian town that I captured from the plane.}

The down side to adding an image to your watermark with Picnik: It takes quite a bit of time, seeing as you have to re-add your mark from scratch every time you use it.  You have to not only select your text and image, but also incorporate them together and do everything else: sizing, fading, moving, etc.  I've learned that time is of the essence while editing photos, especially several at a time, and this just adds and extra two or three minutes to everything else.  If you're not worried about the extra time, however, go for it! =)

~~~~~~~~~~~~~~~~~~~~~~~~~~~~~~~~~~~~~~~~
Do you have any further questions about watermarking that I might be able to answer?  Or do you have any watermarking tips for ME?  Do drop me a comment and let me know!

I hope that this answered your question, Sveta.  And I'm also hoping that it may have given some of you a few watermarking ideas to use:-)

Love and Blessings,
~Hannah